
Monday 18 December 2017
New post on Jurassica Explain It All
Hey friends! At present I can not link my new blog to Bloglovin', which is a crying shame because I don't want to lose touch with you all!
My latest post is now live at Jurassica Explains It All , take a look around! I've lots to share in the run up to Christmas, including cruelty free makeup reviews, makeup inspiration, tutorials and so many music playlists!!!
And please follow me on Pinterest for lots of warm fuzzies, inspiration and more makeup reviews/ treats for your eyeballs!
Thank you and love, love as always!
Jurassica
Friday 15 December 2017
NEW BLOG AND WEBSITE
HELLO OLD FRIENDS! OH HOW I HAVE MISSED YOU! DID YOU MISS ME?
WELL, IT HAS BEEN RATHER A LONG TIME, HOWEVER I'M SO HAPPY TO ANNOUNCE THAT MY NEW MAKEUP, FX, MUSIC & LIFESTYLE BLOG & WEBSITE ARE NOW LIVE! I CAN'T WAIT TO SHARE LOTS OF NEW & ORIGINAL CREATIVE CONTENT WITH YOU ALL!
CHECK IT OUT AND FOLLOW ME AT Jurassica Explains It All

SEE YOU THERE!
LOVE, LOVE!
PS YOU CAN ALSO FIND ME ON INSTAGRAM, FACEBOOK, TWITTER & PINTEREST @jurassica85 xoxoxoxo
WELL, IT HAS BEEN RATHER A LONG TIME, HOWEVER I'M SO HAPPY TO ANNOUNCE THAT MY NEW MAKEUP, FX, MUSIC & LIFESTYLE BLOG & WEBSITE ARE NOW LIVE! I CAN'T WAIT TO SHARE LOTS OF NEW & ORIGINAL CREATIVE CONTENT WITH YOU ALL!
CHECK IT OUT AND FOLLOW ME AT Jurassica Explains It All
SEE YOU THERE!
LOVE, LOVE!
PS YOU CAN ALSO FIND ME ON INSTAGRAM, FACEBOOK, TWITTER & PINTEREST @jurassica85 xoxoxoxo
Tuesday 28 June 2011
Oxford Part Deux
Finally getting around to posting this! I hope you find it interesting... there are a lot of photos so I'll try to limit my yabbering! I photographed some of the museum blarb from the exhibits which intrigued me, hope it intrigues you too!
My second day in Oxford we decided to take a little drive and see what we could see! Our adventure led us to Woodstock, Oxfordshire, a sickeningly picturesque little village just outside of Oxford proper, home to Bleheim Palace, birthplace of Winston Churchill.


First we stopped by Harriet's Tearoom for a typically English feast of pasties, quiches, ploughmans and scones. Mmmm!!!!
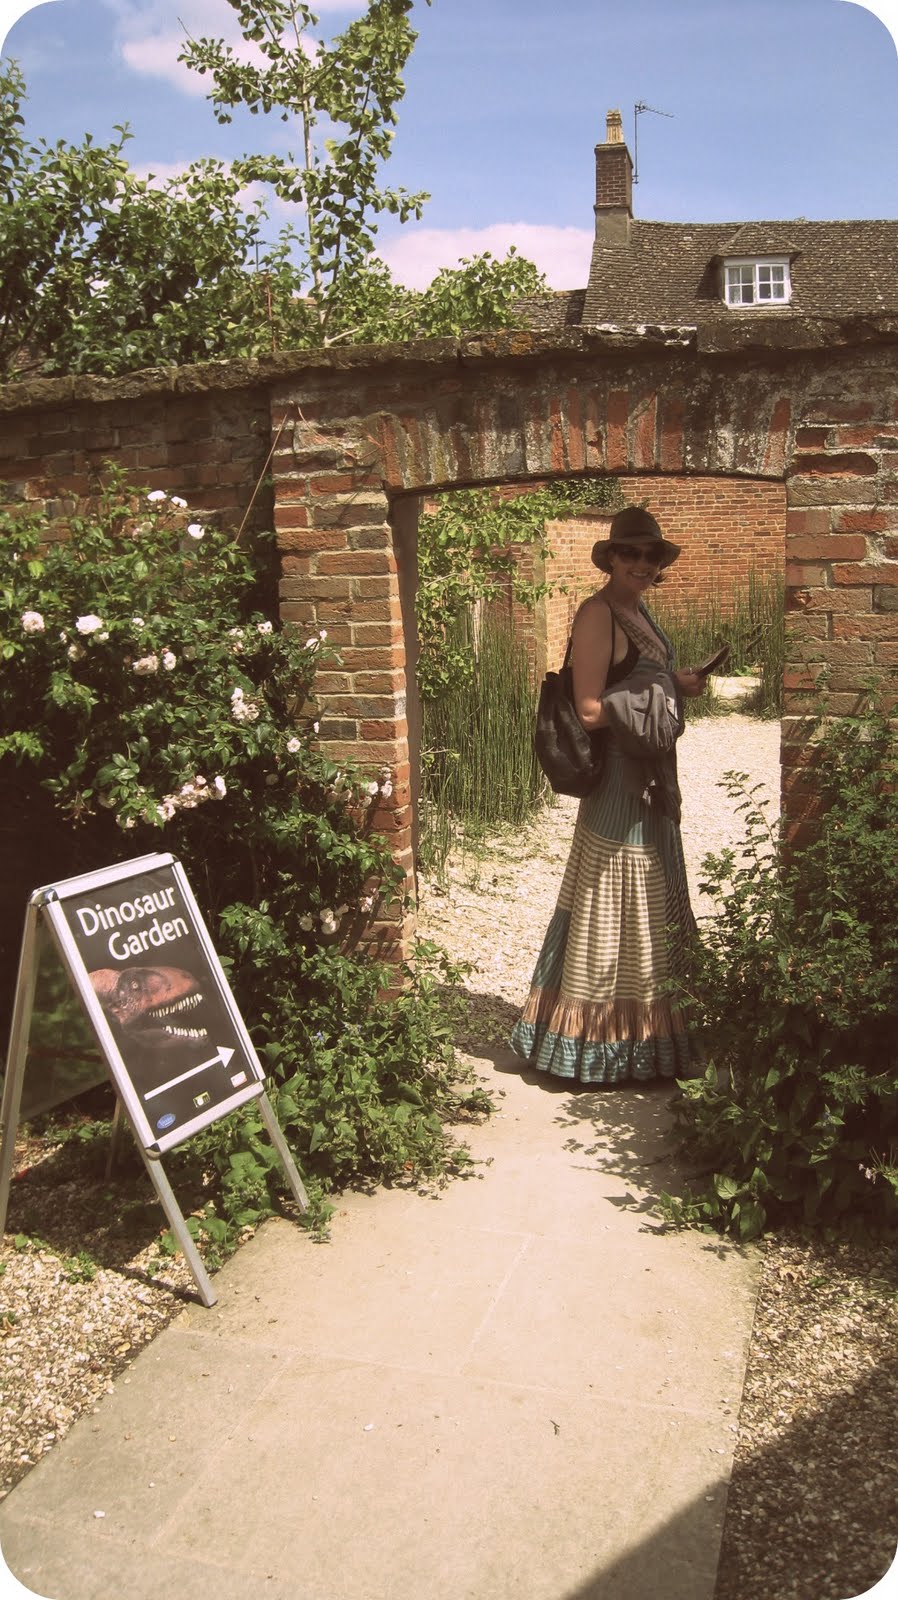
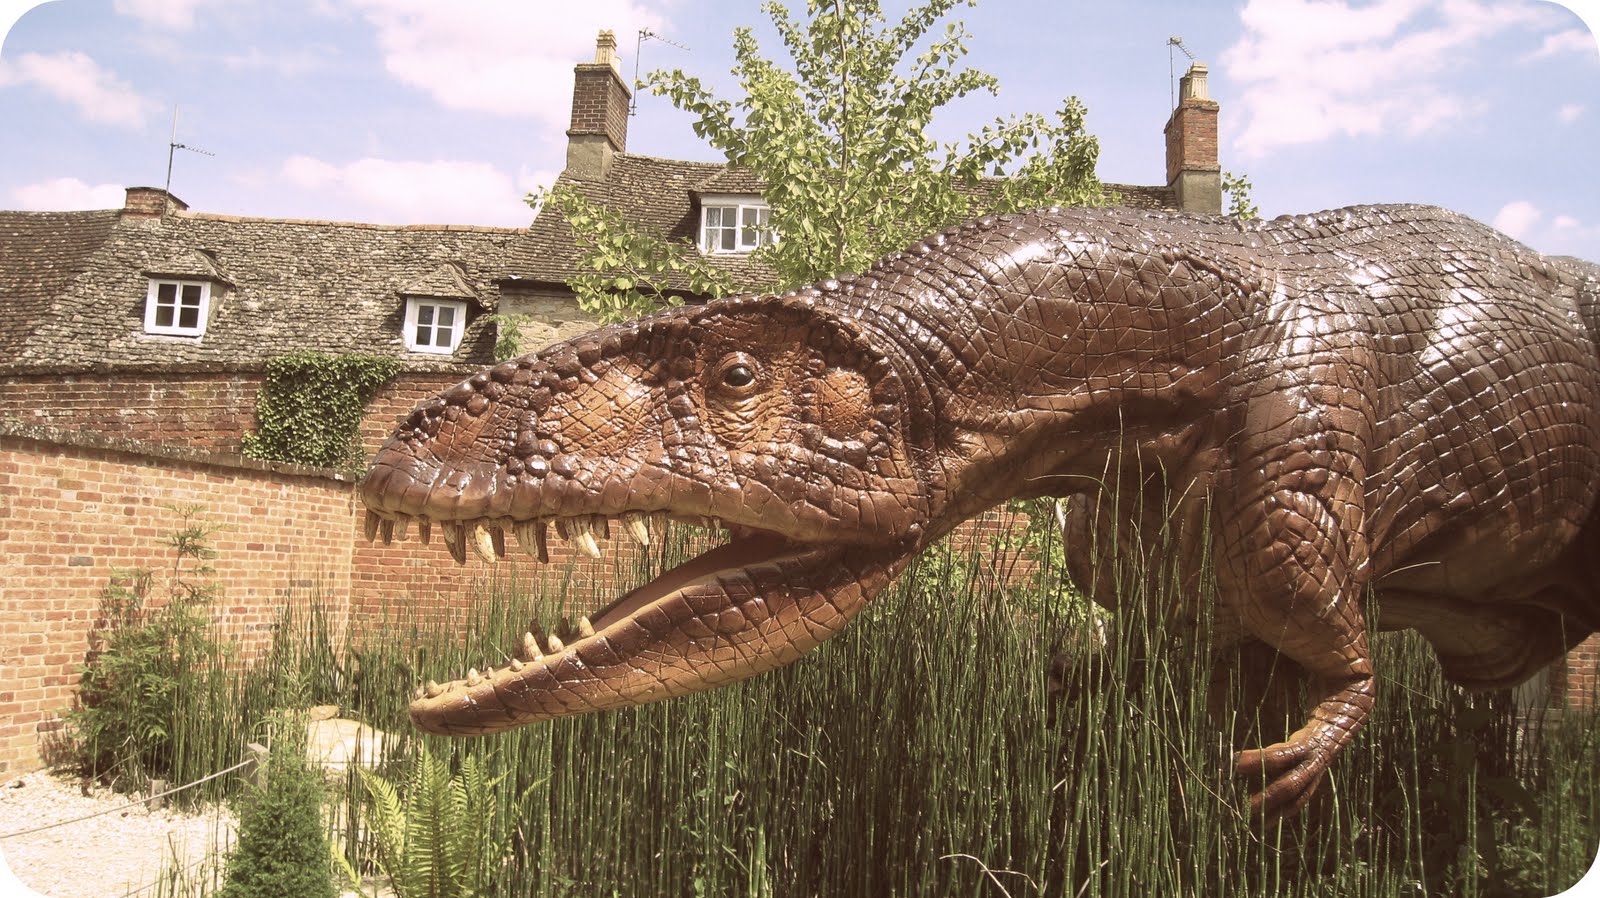
 Then we headed to the Oxfordshire museum... which has some amazing exhibits... a dinosaur garden (!!!) and a fantastically eclectic giftshop. Of course, I was eager to check out the Jardin des dinosaures first!


 In the Dinosaur garden there are a collection of real Dinosaur footprints! (I think i've blogged before about my dinosaur obsession!)


One of my favourite aspects of this museum was how interactive it is... there were even hats and jackets to play with in the WW2 exhibit!

These helmets are SO heavy, by the time this photo had been snapped I already had a headache... huge respect for the soldiers who had to endure them for so many hours!

I freakin' love this 1940s army jacket!

The hat is pretty sweet too!


 I wish I could have taken him home with me!


Oh, and I finally got to see my UV nail polish in action in the "science room"

Now, finally we have arrived at my favourite part of the museum... the kids dinosaur room. And here's why...


I was blown away by this hooded cape Triceratops costume... what ingenious costume making!
Part 3 coming soon!
Love, love
PS For more information on The Oxfordshire Museum and upcoming exhibits click here
My second day in Oxford we decided to take a little drive and see what we could see! Our adventure led us to Woodstock, Oxfordshire, a sickeningly picturesque little village just outside of Oxford proper, home to Bleheim Palace, birthplace of Winston Churchill.


First we stopped by Harriet's Tearoom for a typically English feast of pasties, quiches, ploughmans and scones. Mmmm!!!!


 In the Dinosaur garden there are a collection of real Dinosaur footprints! (I think i've blogged before about my dinosaur obsession!)


One of my favourite aspects of this museum was how interactive it is... there were even hats and jackets to play with in the WW2 exhibit!

These helmets are SO heavy, by the time this photo had been snapped I already had a headache... huge respect for the soldiers who had to endure them for so many hours!

I freakin' love this 1940s army jacket!

The hat is pretty sweet too!

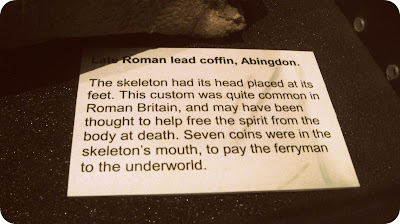
Next up was the Roman room.. which was fascinating... Lots of human skeletons and interesting little tidbits of morbid Roman history (day to day life, traditions involving death and tragedies such as the plague were always my favourite parts of my history lessons!)


Interesting fact: Glove Making was one of Woodstocks chief industries! (Click to enlarge and read!)

Of course some taxidermed big game! <3

Oh, and I finally got to see my UV nail polish in action in the "science room"

Now, finally we have arrived at my favourite part of the museum... the kids dinosaur room. And here's why...


Hand sewn dinosaur costumes for (kids) to play in!!!! Naturally I had to have a quick game of dinosaurs before we left...

I was blown away by this hooded cape Triceratops costume... what ingenious costume making!
Part 3 coming soon!
Love, love
PS For more information on The Oxfordshire Museum and upcoming exhibits click here
Friday 24 June 2011
Thrift of the Week...

We're back! Thrift of the week has been on hiatus due to an overwhelming number of thrifted delights during my last stint in LA... far too many to talk about.. followed by a severe drought back in England. But this week the thrifting Gods were smiling upon me!


I scored these vintage frames at work no less... I don't think I've ever mentioned what is it I do for work while I'm in England.. well I work for my Dad who owns a chain of independent Opticians. This week I was sorting through the recycled glasses when I spied some vintage cases, which immediately sparked my interest (they really don't make spectacle cases like they used to!)... inside were these little gems... unsurprisingly due to my fathers profession, I already have a pretty vast collection of vintage frames.. but a few more can't hurt! Plus the sunglasses look fabulous on.. so unusual to find a semi rimless winged sunglass!!!!
For giggles, here is a pic of me in the first pair, before I removed the reading lenses hahaha

Next up are a few things I picked up at my favourite UK thrift shop, located in the grounds of a local hospice.
FYI I have this thing that I subconsciously do when on my way to a thrift shop... which may or may not raise my freak flag haha... I come up with a mental list of items I am looking for (usually hats, well tailored high waisted shorts/ pants/ skirts... hand knits... shirts in good fabrics..and real leather purses) I'd say 80% of the time when I think about what I am looking for... I find it. And, this week was no exception. (I found the glasses the day before, and would you believe vintage winged sunnies were on my to-find list!! Spookaroo!!)
Here's what was my list this wk:
Sleeveless collared shirt
High waisted shorts
Hat (like I need more hats!)
Sunglasses
A purse (to replace the one that died in LA)


This baby was a humble £2.00 and looks pretty rad on... although I can already hear my Grandma giggling at me for wearing it backwards, but I just love the way this style looks the wrong way round!


This wasn't exactly on my "list" (although I am always looking for shirts as I think they are the hardest thing to purchase!)
It's the softest cheese cloth... satisfies my adoration for broderie anglais and has the cutest little buttons on the shoulders. Plus it's just the right cropped length. The perfect partner for high waisted stonewashed denim. £1.75

Speaking of high waisted stonewashed denim.. these shorts were begging me to take them home. They're not vintage.. but pretty damn near perfect. There's a button missing so they were a mere £0.60p ... never worn... with the Topshop tags still on them (incidentally the original retail price was £30.00)

Lastly... sleeveless collared shirt! Huzzah! I love the deep V and the wide collar... the fabric has a nice drape too. £1.70
But wait.. there's one more thing!
Before I hit the hospice shop, I went to visit a friend from my old job who is recovering from key hole surgery (check out her blog here and wish her lots of get well soons!) Anyways, she had recently done some scavenging in her attic and found a whole mess of vintage treasures... and very sweetly gifted this purse to me... my list is complete!!!!! Thank you my love and feel better soon!!!!!

It's chocolate faux alligator with a clasp closure that snaps like a dream!
Well, I think I've rambled on quite enough for one evening, I still have to tackle the remainder of my Oxford trip at some point...
Have any of you thrifted anything exciting lately?
Love, love
Thursday 23 June 2011

Tuesday 21 June 2011
Dree Part Trois
3rd Installment From our shoot with Greg Reeves, while I muster up the energy to tackle the mamoth Oxford Part II!!!

 *click image to view full size*


Subscribe to:
Posts (Atom)